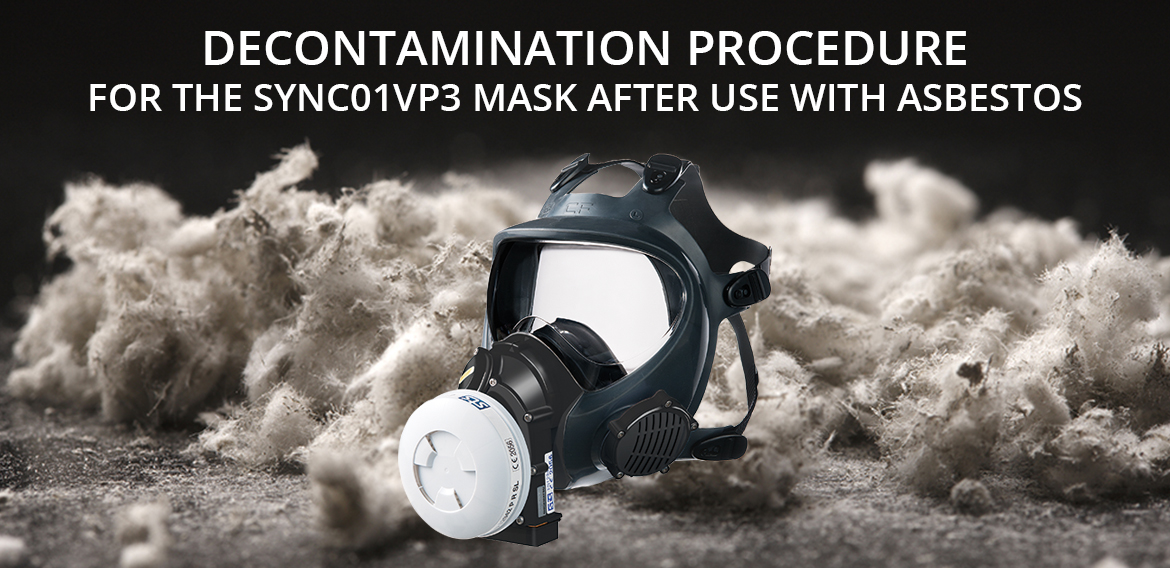
IMPORTANT: This document has been prepared by ph7 International Ltd to provide additional information to guide users through a recommended decontamination process for the Shigematsu Sync01VP3 when used in environments where friable asbestos may be present. This document should be read in conjunction with the standard care and maintenance procedures set out in the Syncro Instruction Manual that comes with the respirator. This is a guide only and users of the respirator are responsible for ensuring the decontamination process is fit for purpose.
This guide relates only to the cleaning of the Shigematsu Sync01VP3 respirator to ensure a long service life. It is NOT a guide on how to decontaminate personnel after removing asbestos. For information on recommended asbestos decontamination please refer to the Approved Code of Practice for the Management and Removal of Asbestos.
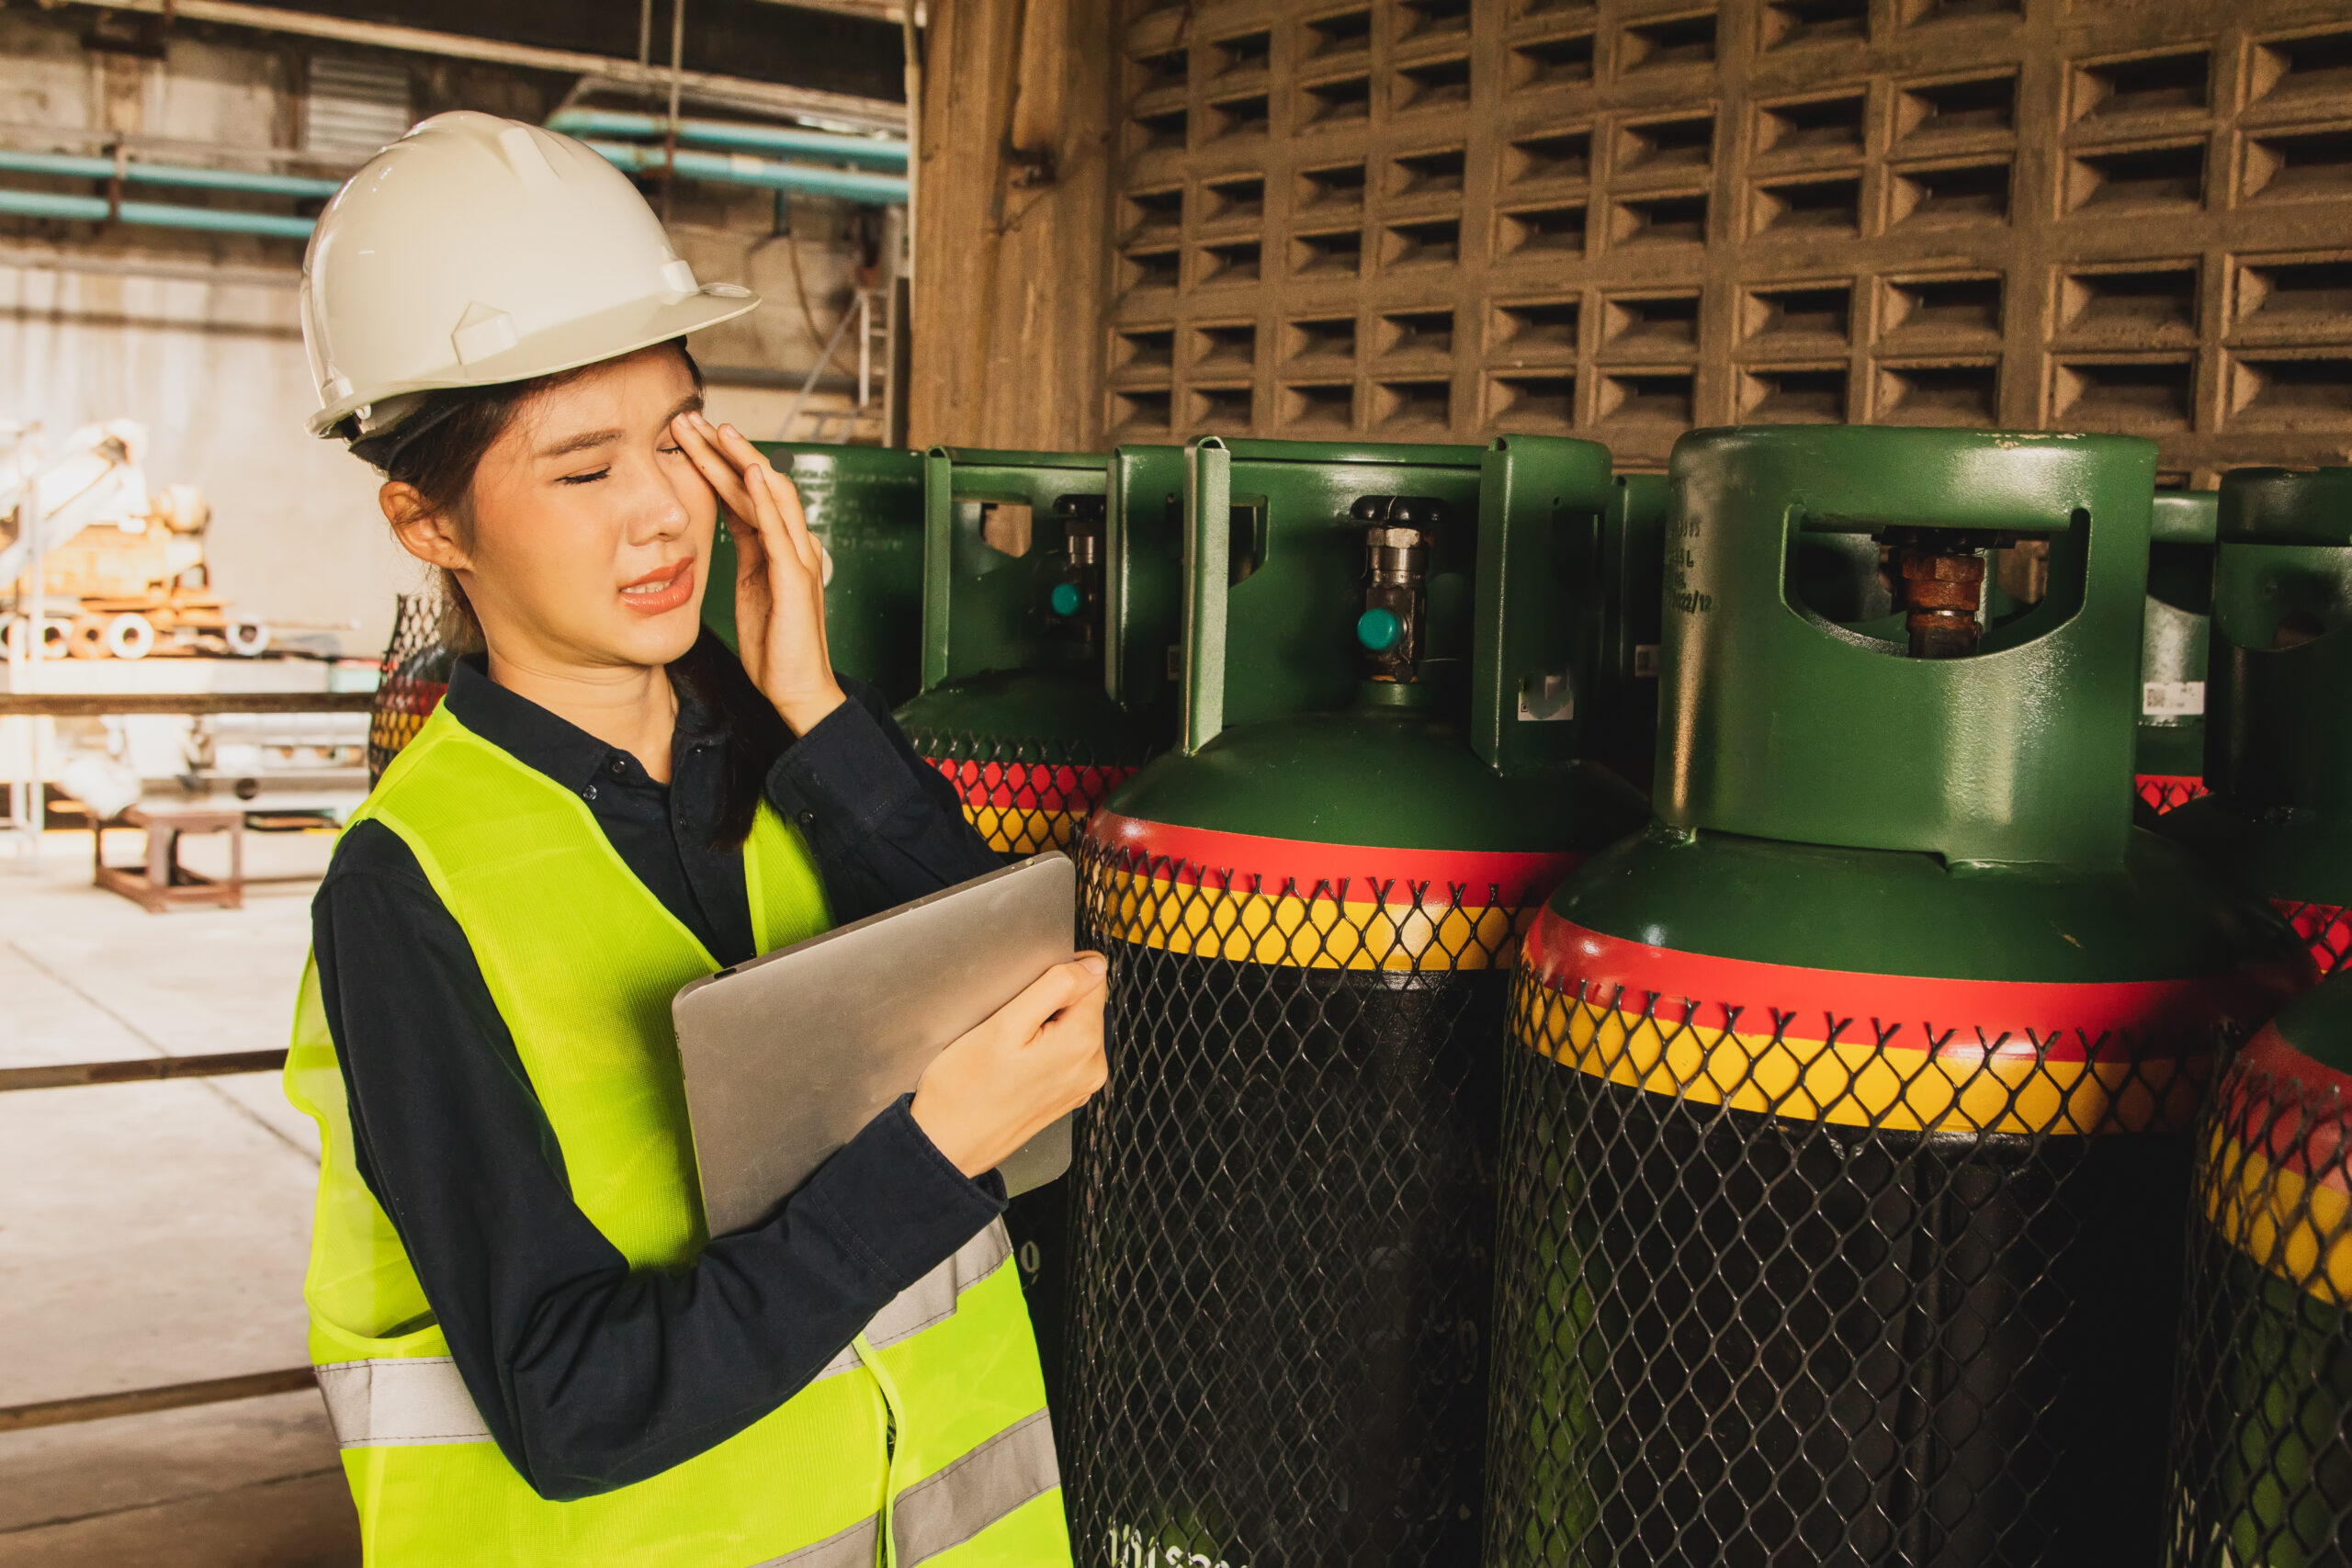
Follow standard decontamination procedures for leaving an area with possible friable asbestos contamination.
Note: The Sync01VP3 when fully assembled (mask + fan unit + filter) and worn by the user, is rated IP65 which means it is rated as “dust tight” and protected against water projected from a nozzle. It is therefore safe to continue to wear the respirator throughout the decontamination process. DO NOT remove your respirator while in the decontamination shower as water entering the inside of the mask may damage the fan unit.
Steps and considerations for thorough cleaning of Sync01VP3:
[br]
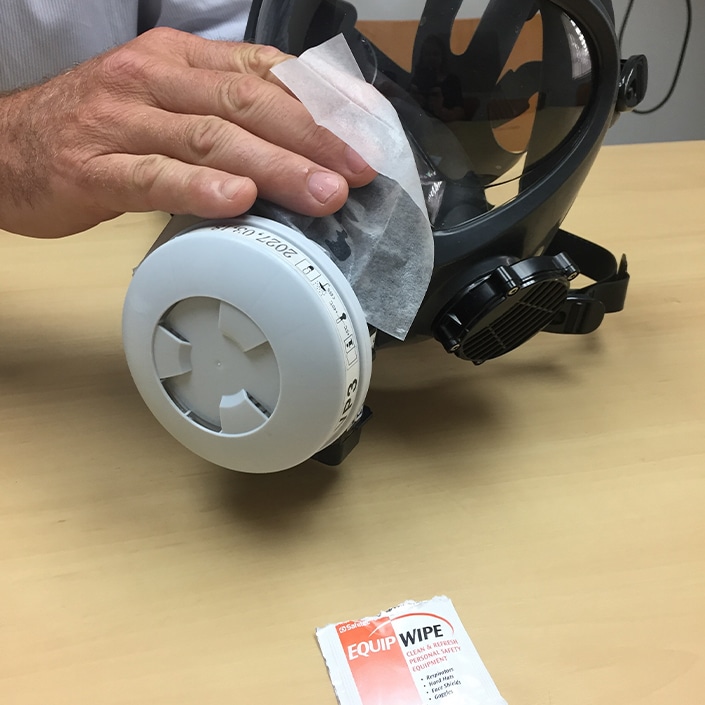
Step 1: Surface wipe for fully assembled unit
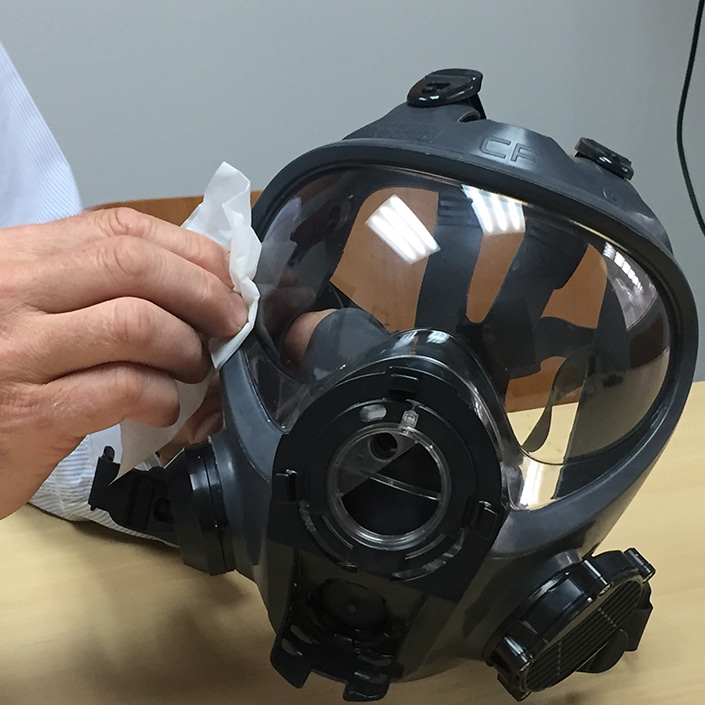
Most of the dust and dirt should have been removed during the decontamination process. When it is safe to remove your respirator do so and use an alcohol wipe or moist cloth to wipe the outside of the full assembled respirator.
[br]
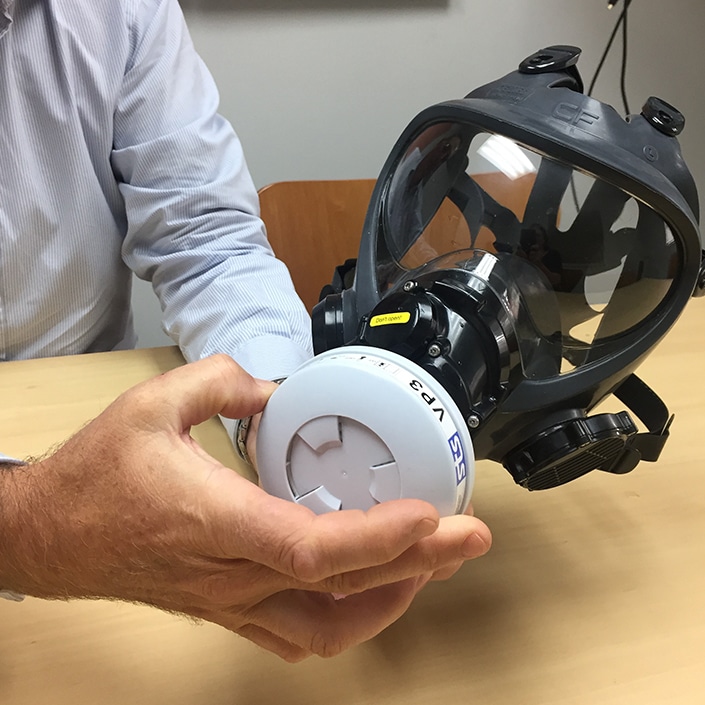
Step 2: Removed VP3 Filter
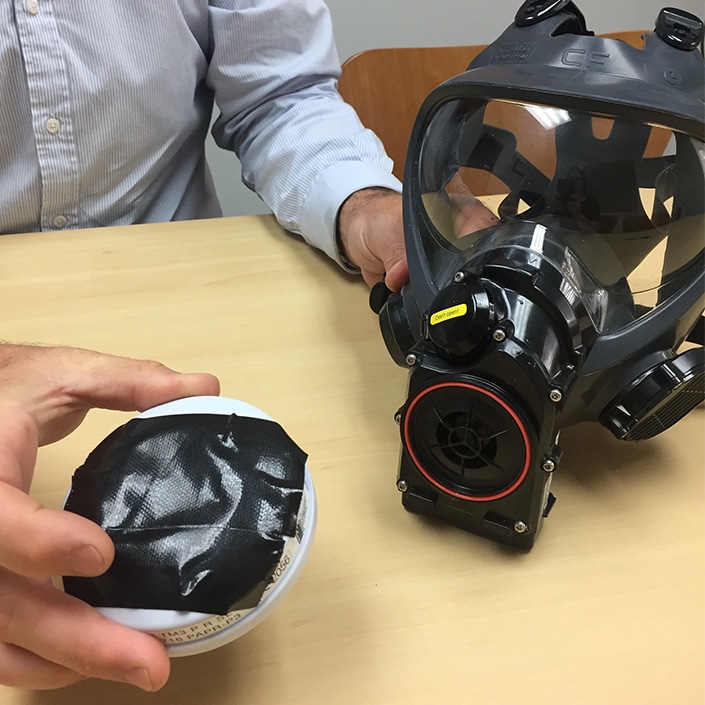
Carefully remove the VP3 filter by unscrewing it anti-clockwise, making sure not to knock or drop the filter which may release asbestos fibres. It is considered best practice to dispose of the filter after each shift when working with asbestos.
However, in New Zealand this is not a legal requirement and, in some instances, where the risk is assessed as being low the filter may be reused. For example, where the wearer has entered an area of potential asbestos contamination for short period to conduct air quality testing. It is the sole responsibility of the user to undertake a thorough risk assessment to determine whether it is safe to re-use the filter. If the filter is to be re-used it is recommended that tape be applied across the filter intake to stop any dust particles falling out.
[br]
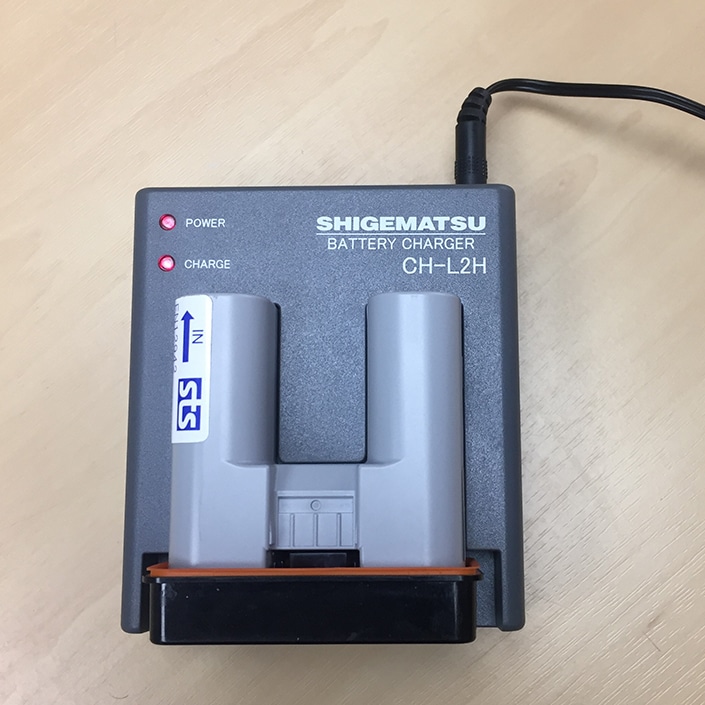
Step 3: Remove and Clean Battery
Press the orange button on the battery to release it and carefully remove the battery.

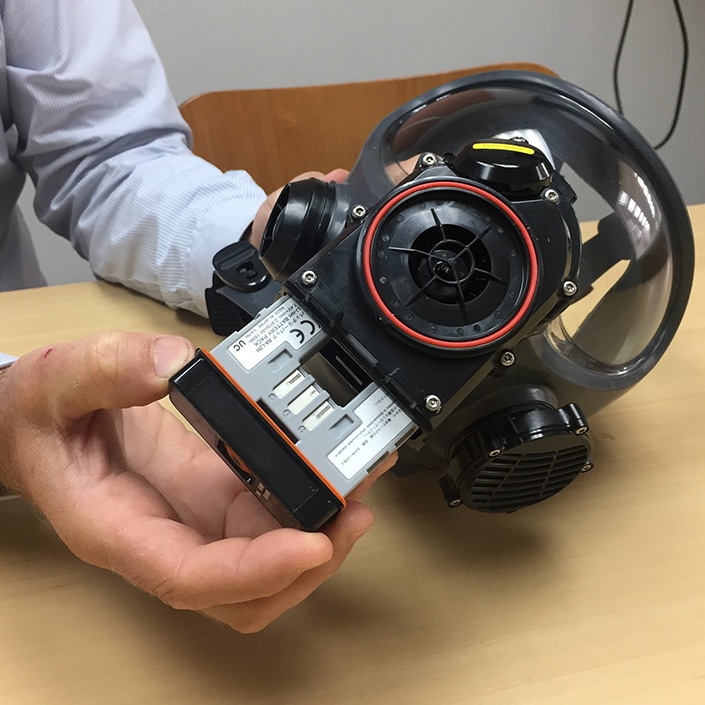
Using a damp cloth or alcohol wipe, clean all surfaces of the battery.
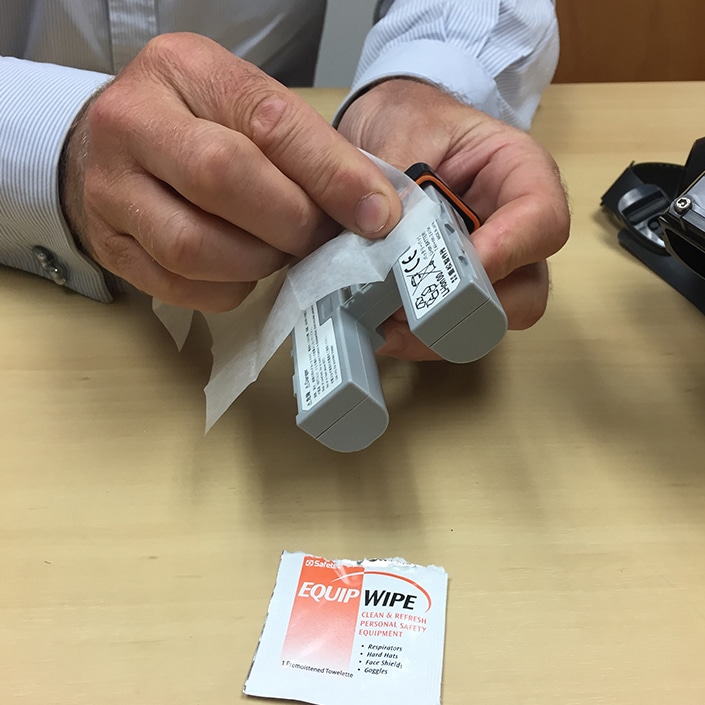
Check the connections are clean and allow the battery to fully dry and all alcohol cleaner to fully evaporate before placing battery in charger as required.
[br]
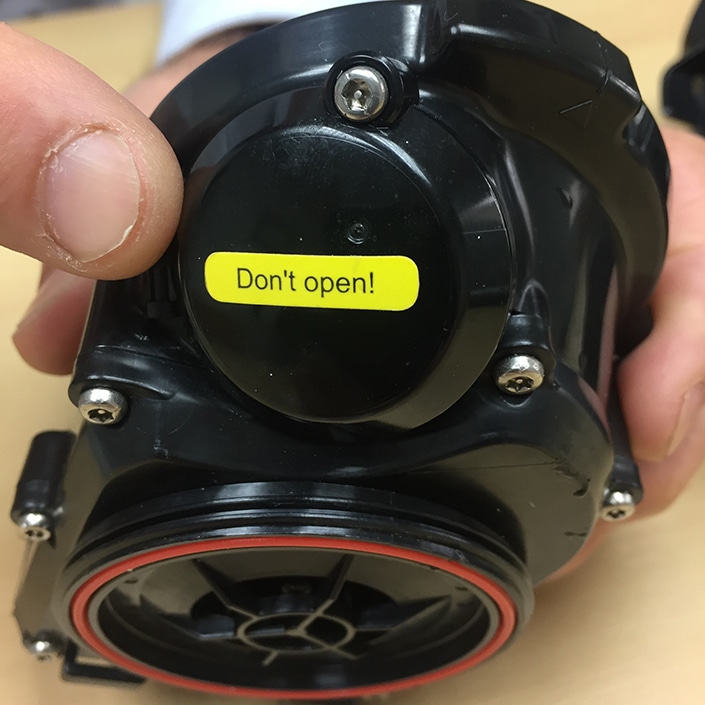
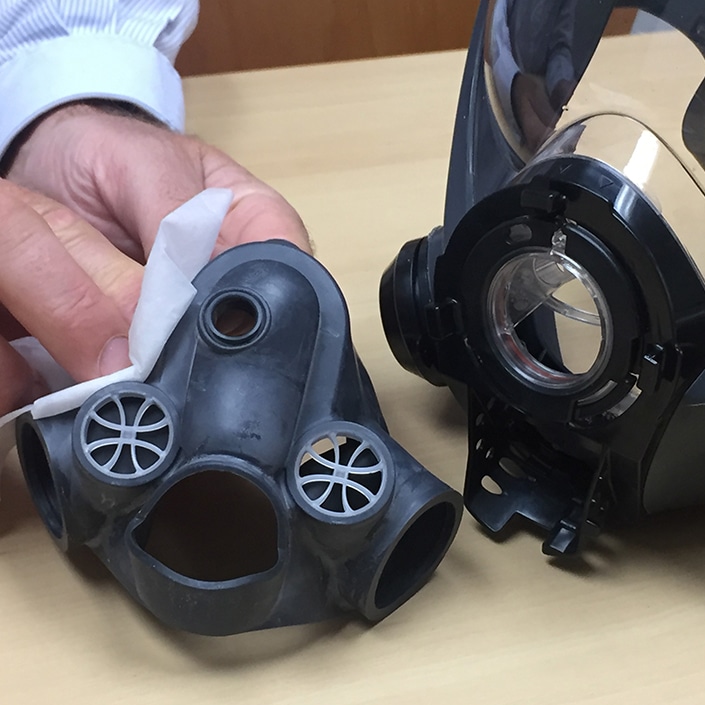
Step 4: Remove and Clean Fan Unit
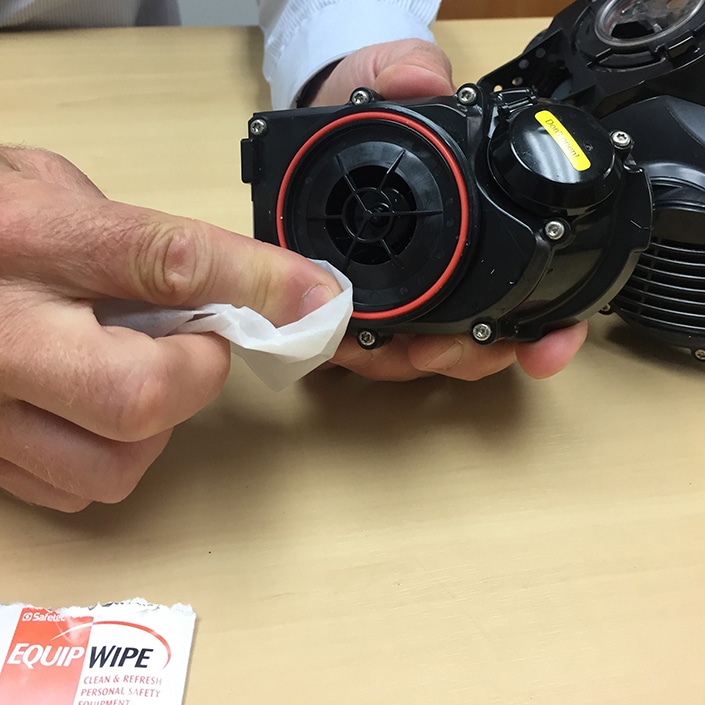
Remove fan unit as shown in the Snyc01 Instruction Manual and clean using a damp cloth or alcohol wipe. Be careful not to put anything into the inhalation port. DO NOT get the fan unit wet (when not completely assembled with mask and filter) as this is likely to damage the sensor in the unit and void the warranty.

DO NOT open the breathing monitor (Clearly labelled “don’t open!”)
Wipe and check the orange gaskets on the front and back of the fan unit. These can be replaced if they show any signs of degradation (see Instruction Manual for part numbers).
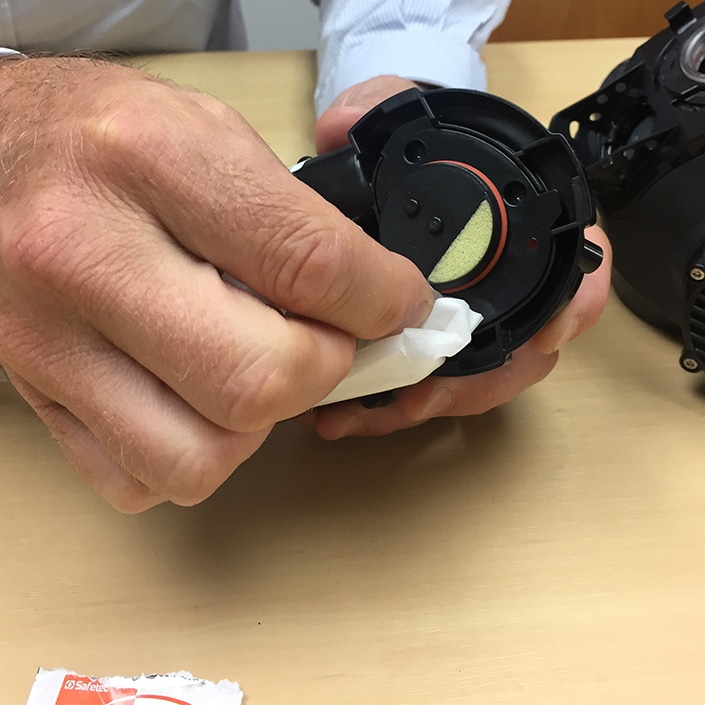
Check the Inhalation valve on the back of Fan Unit ensuring there are not tears or signs of damage. This part can be replaced if required (see Instruction Manual for part numbers). Check Guarding Sponge is intact. This part can be replaced if required (see Instruction Manual for part numbers).
Hold Fan Unit upside down to see inside where the battery is held. A heat detection sticker should be visible with the number “60” printed on it. Check that the sticker is white. If it is green, it means that the Fan Unit has gone above 60°C which can lead to the sensor malfunctioning.
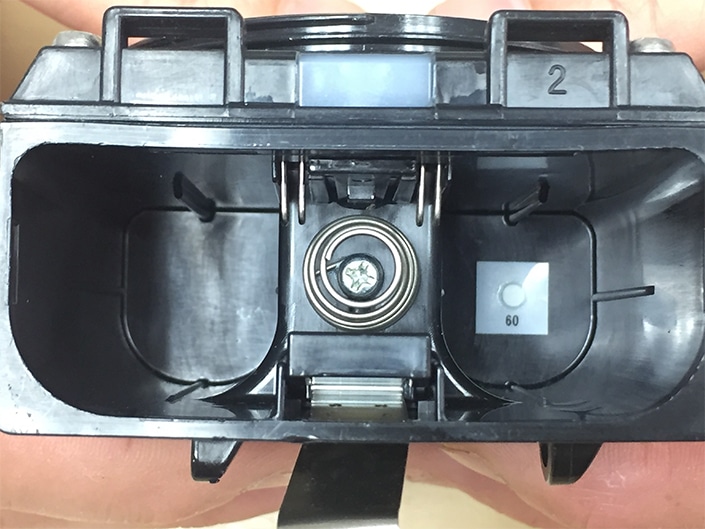
Note: The Sync01VP3 can operate in conditions between 0°C and 50°C. It is important that the Sync01VP3 Fan Unit is not exposed to conditions hotter than 60°C. Avoid leaving the Sync01VP3 in vehicles or containers with direct sunlight.
[br]
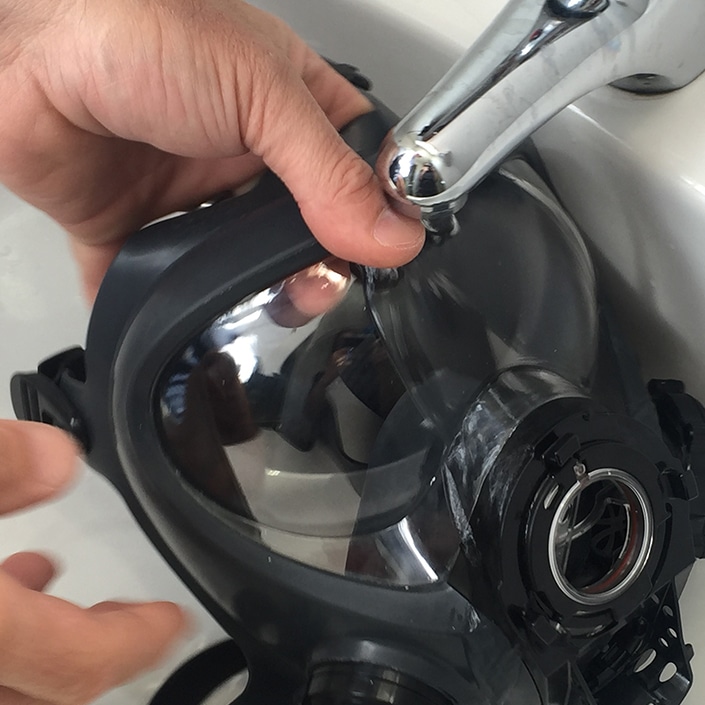
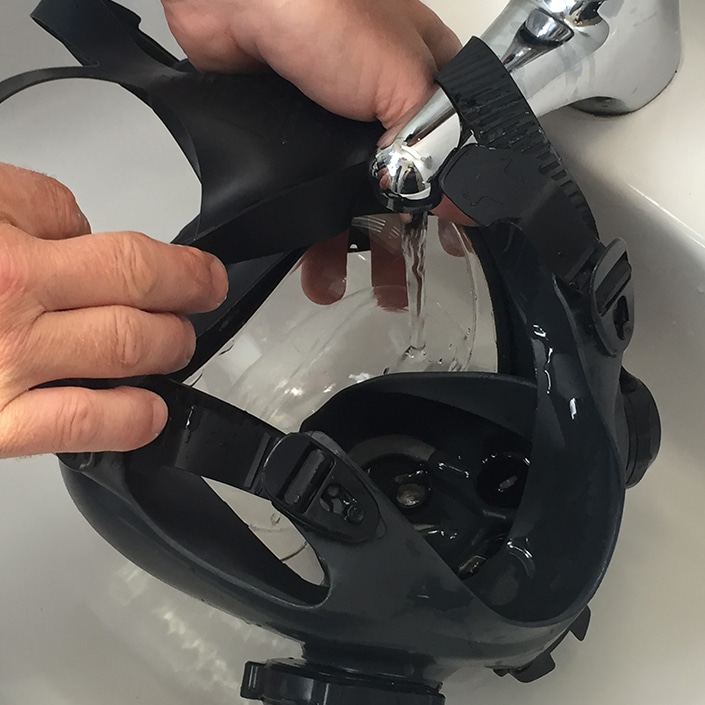
Step 5 Wash and Check Mask
Now that the Fan Unit, Battery and Filter have been removed the mask can be thoroughly wiped down with an alcohol wipe and then washed with water.
All parts cleaned and inspected as follows:
Remove Inner Mask, check Inner Mask Valves are intact (replace if necessary). Wipe Inner Mask with alcohol wipes or damp cloth and rinse with clean water. Allow to dry.
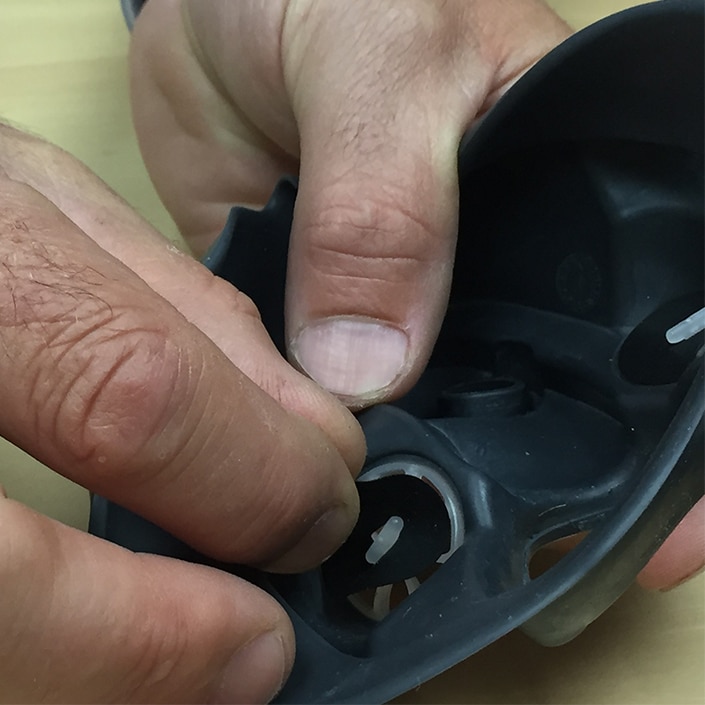
Check Drain Valve and replace if necessary.
Open Exhalation Valve Cover and check and clean Exhalation Valve (replace if necessary).

Wipe all surfaces of the mask with an alcohol base wipe or damp cloth paying attention to area which some into contact with skin or where sweat can accumulate. Thoroughly rinse mask inside and out. Allow to dry.
Check Head Harness by looking for deterioration of the straps (replace if necessary)
[br]
Step 6: Store in box provided
Once cleaned store the component in the box provided ready for next use. Ensure the Sync01VP3 is stored away from direct sunlight in a dry, cool area.
A list of all replacement part numbers, plus further instructions for the correct use and maintenance of your Sync01VP3 can be found in the Instruction manual supplied with the unit.
Click here to download a pdf version of these procedures.
For advice on the correct way to clean or decontaminate your Sync01VP3 Respirator, contact ph7 International on 0800 323 223, enquiries@ph7.co.nz or via the website.
[/vc_column_text][/vc_column][/vc_row]